To use scanner roller replacement maintenance effectively, we first identify signs of wear, like paper jams and flattened rollers. Before replacement, we prepare by organizing our workspace and gathering tools. We carefully remove worn rollers, clean the shafts, and install new ones, making certain they click into place. After installation, we clean the scanner and conduct test scans to guarantee peak performance. Regular checks and maintenance enhance efficiency, and there’s more to explore to maximize our scanner’s capabilities.
Key Takeaways
- Regularly monitor roller usage counters and replace rollers after 200,000 sheets or annually to maintain optimal scanning performance.
- Prepare your workspace by cleaning and organizing tools like screwdrivers, gloves, and replacement roller kits before starting the replacement process.
- Carefully follow the scanner’s maintenance manual for detailed instructions on removing worn rollers and installing new ones.
- After roller replacement, clean the scanner glass and internal feed path to ensure optimal scanning quality and performance.
- Conduct routine maintenance checks every few weeks to prevent dust buildup and enhance the scanner’s functionality.
Identifying Roller Replacement Needs
When we think about our scanning needs, it’s crucial to identify when roller replacement is necessary. Signs of roller degradation can manifest as frequent paper jams or the scanner pulling multiple sheets at once. We should always check for wear indicators, like thinned or flattened rollers. Regular visual inspections help us catch problems early and avoid costly repairs. Most scanners recommend replacing rollers after about 200,000 scanned sheets, or annually if usage remains consistent. It’s also wise to monitor built-in counters to guarantee we’re on track for timely replacements. By addressing roller wear proactively, we can maintain peak scanning performance and avoid interruptions during our tasks. Prioritizing this upkeep ultimately enhances our productivity. Additionally, considering the compatibility with existing printer models is essential to ensure the new rollers function optimally.
Preparation Before Replacement

After we’ve identified the need for roller replacements, it’s time to prepare for the process. First, let’s make certain our workspace organization is exceptional; a clean area minimizes dust and contamination during the replacement. We should gather all necessary tools like screwdrivers, gloves, and the replacement roller kits beforehand. Don’t forget to disconnect the scanner from the power source to avoid any electrical hazards. It’s essential to remove all paper from the input and output trays, allowing us easier access. Using a soft cloth or anti-static mat can help protect delicate scanner parts. Finally, let’s review the maintenance manual to familiarize ourselves with specific roller assembly instructions, making sure we’re ready for a successful replacement. Additionally, using cleaning cards can help maintain the scanner’s performance and prevent future issues during the replacement process.
Removal of Worn Rollers
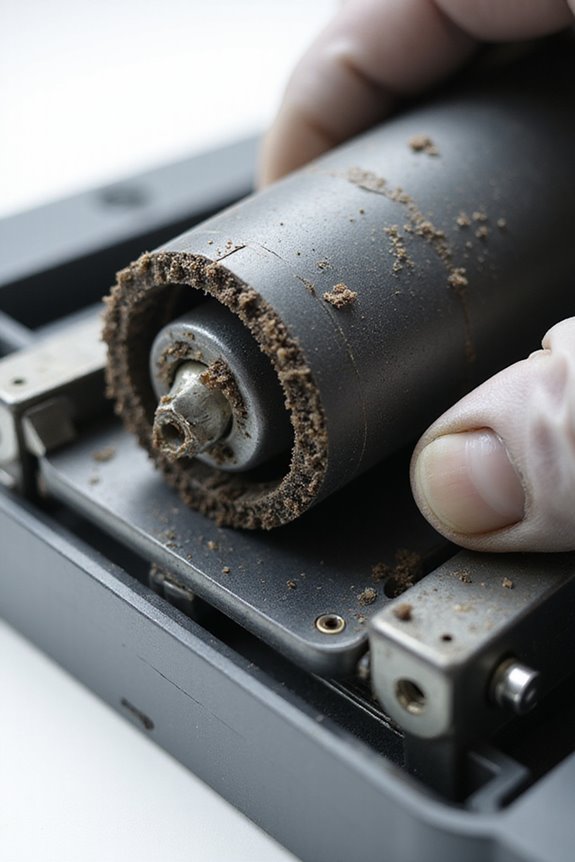
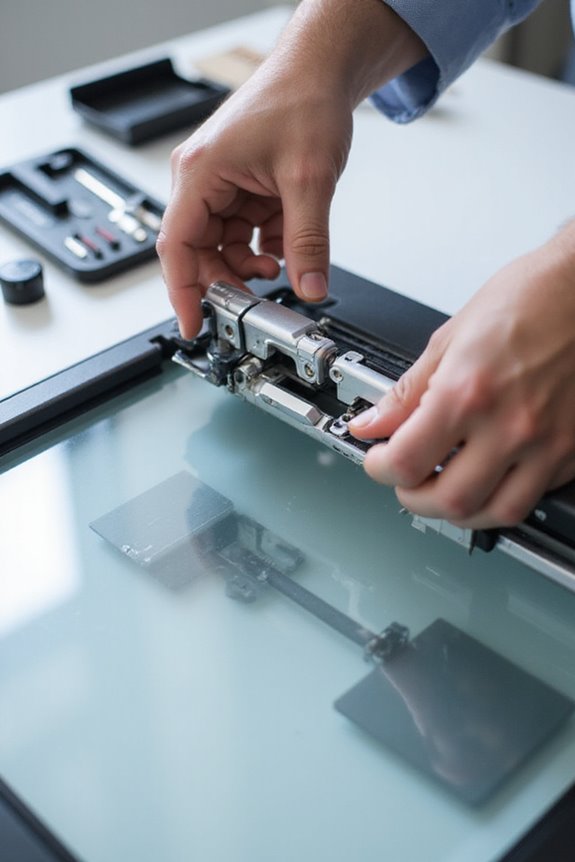
To kick off the removal of worn rollers, we’ll power down the scanner, ensuring safety during the process. We’ll start by unplugging the power cable and waiting at least 15 minutes. Next, we’ll remove any documents and clear the Automatic Document Feeder (ADF) paper chute. Opening the ADF or scanner cover exposes the worn rollers, which may involve lifting tabs or releasing latches. To disengage the rollers, we’ll rotate release levers on the roller shafts carefully. If the rollers are stuck or melted, we might use a razor blade for gradual removal. Finally, let’s clean the shafts and check for wear or damage — these maintenance tips can help prolong the lifespan of different roller types in our scanner. Regular cleaning and maintenance of the rollers can significantly enhance scanning speed efficiency for optimal document management.
Installation of New Rollers
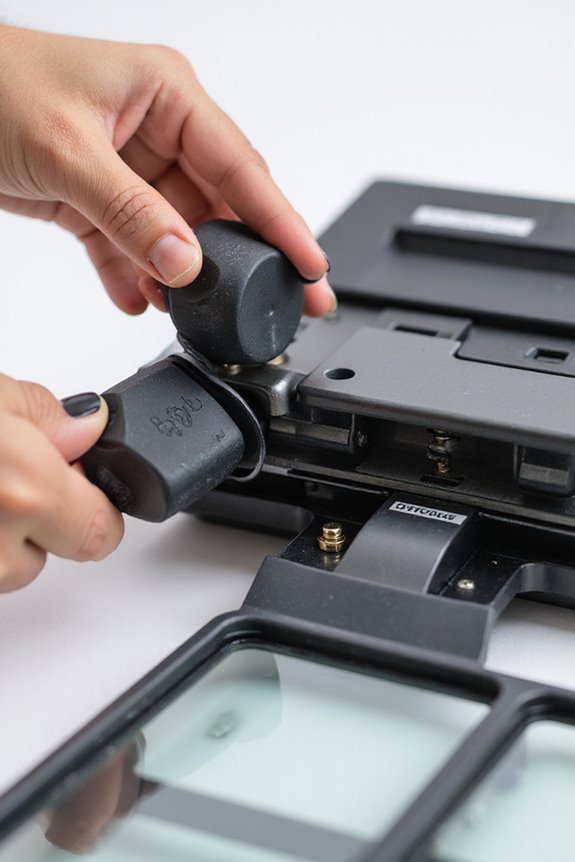
Installing new rollers is a straightforward process that can markedly enhance your scanner’s performance. First, we’ll guarantee the scanner’s on with the input tray open, then carefully access the rollers by opening the cover. We’ll begin by installing the separation roller, aligning its axis with the right side hole and gently pressing it into place—watch for those alignment notches! Next, we’ll tackle the pickup roller, guaranteeing we slide it into position until it clicks securely. Remember to handle the rollers by the edges to avoid contamination. By utilizing the correct roller types from our kits, along with these maintenance tips, we’ll maximize scanning efficiency and reduce misfeeds for a smoother workflow. Regular maintenance of duplex scanning features is essential to ensure optimal performance over time.
Post-Replacement Procedures
Once we’ve replaced the scanner rollers, we should turn our attention to the vital post-replacement procedures that guarantee the scanner functions efficiently. First, we’ll perform proper cleaning of the scanner glass and internal feed path, ensuring any dust or debris from the replacement is removed. Next, let’s test the scanner by running sample scans, watching for paper jams or unusual sounds that might signal installation issues. We should also reset the scan counter in the utility software to monitor roller usage accurately. Finally, conducting routine calibration scans is essential for maintaining impeccable scan quality. By following these steps diligently, we not only enhance performance but also extend the lifespan of our scanner, ensuring maximum reliability and efficiency. Regular maintenance every few weeks to a month prevents dust buildup and enhances print clarity.
Sourcing Replacement Parts and Support
When sourcing replacement parts for our scanners, we need to contemplate both authenticity and performance. Opting for OEM advantages, like the Brother PRK-A3001 for our ADS-4300N, guarantees a precise fit and peak performance. Genuine parts preserve warranty and improve roller lifespan, ultimately reducing maintenance frequency. While aftermarket considerations present competitive pricing, we must evaluate their quality—ISO-certified manufacturers often indicate reliability. These alternatives can still deliver high sheet handling capacity, ideally around 200,000 sheets. To avoid installation issues, always verify compatibility with our scanner models. Trusted suppliers, both online and local, can provide a range of options. Remember, thorough research on vendor reviews aids in selecting the best parts for efficient and dependable scanner maintenance. Additionally, considering the material durability of the case can significantly impact the overall protection of your scanner during maintenance operations.
Frequently Asked Questions
How Often Should I Check My Scanner Rollers for Wear?
We should check our scanner rollers for wear regularly, ideally every three days for cleaning and at the start of each scanning day. This helps optimize scanner maintenance and extends roller lifespan for consistent performance.
Can I Use Third-Party Rollers Instead of OEM Parts?
We can consider third-party rollers for their benefits, mainly cost efficiency. However, roller compatibility is essential; using non-OEM parts may affect performance and void warranties, so we should choose wisely for effective scanning.
What Tools Do I Need for Roller Replacement?
When tackling roller replacement, we’ll need a selection of tools including various screwdriver types and cleaning materials. Let’s remember maintenance tips too, as they guarantee proper function and longevity for different roller types in our scanners.
Are There Specific Symptoms Indicating Roller Performance Decline?
Think of our scanner as a trusty steed. When we notice poor image quality, frequent jams, or increased noise, those are clear performance indicators of roller wear. Let’s pay attention before our reliable partner becomes a burden.
How Can I Clean Rollers Effectively Before Installation?
To clean rollers effectively before installation, we should use roller cleaning techniques like microfiber cloths and cleaning solutions. Let’s follow maintenance best practices for ideal performance and guarantee our scanners operate smoothly and efficiently.